Development
Fluidd is built using VueJS, and the Vuetify Framework to provide a cohesive, easy to implement UI.
Contributing
Contributions are welcome! Please review the CONTRIBUTING.md file before submitting a pull request.
Architecture overview
This section is aimed at developers comfortable with Vue and TypeScript who want a quick map of the codebase. For an exhaustive reference, see the CLAUDE.md file at the repository root — it was written for AI coding assistants but works as a deep second source for humans too.
Stack
- Vue 2.7 with Vuetify 2 for UI components
- TypeScript throughout, with class-style components via
vue-property-decorator - Vuex for state management — namespaced modules mirror Klipper and Moonraker domains
- Vite 8 as the build tool and dev server
- Vitest 5 for unit tests —
nodeenvironment by default, withjsdomopted into per spec - Node.js 24 — pinned in
package.jsonviadevEngines.runtime(engines:^22.12.0 || ^24)
How it talks to Klipper
Fluidd does not talk to Klipper directly. Instead, the browser keeps a single WebSocket connection open to Moonraker, which in turn talks to Klipper:
All printer commands and live state updates flow through that single socket. The client lives in src/api/socketActions.ts — for printer control and state, call its methods rather than making direct HTTP requests.
A few features still use HTTP: file upload and download (via axios for progress reporting — fetch cannot report upload progress; see src/mixins/files.ts), camera WebRTC signalling, and the initial config.json fetch at startup.
Repository layout
src/
├── api/          WebSocket JSON-RPC client (socketActions.ts)
├── components/
│   ├── common/   Shared dialogs and status components (auto-imported)
│   ├── layout/   App shell: AppBar, AppDrawer, etc. (auto-imported)
│   ├── ui/       Reusable widgets: AppBtn, AppDialog, etc. (auto-imported)
│   ├── settings/ Settings page components
│   └── widgets/  Feature widgets — one folder per feature
├── views/        Page components, lazy-loaded by the router
├── store/        Vuex modules — one per Klipper/Moonraker domain
├── mixins/       Shared component logic (StateMixin, FilesMixin, ...)
├── plugins/      Vue plugins (i18n, socketClient, vuetify, filters)
├── router/       Vue Router (hash mode)
├── locales/      i18n YAML files (managed via Weblate)
├── scss/         Global styles and Vuetify variable overrides
├── util/         Helper functions
├── workers/      Web Workers (G-code parser, MJPEG stream, Monaco language servers)
├── typings/      Global TypeScript declarations (Klipper, Moonraker namespaces)
└── types/        UI-specific TypeScript types
Patterns you'll meet immediately
Class-style components. Every component uses decorators — no Options API or Composition API. Components that need printer state extend a mixin via Mixins():
@Component({ components: { /* ... */ } })
export default class PrinterWidget extends Mixins(StateMixin) {
  @Prop({ type: String, required: true })
  readonly label!: string

  get klippyReady (): boolean {
    return this.$typedGetters['printer/getKlippyReady']
  }
}
Vuex modules live in src/store/<name>/ with a standard layout (index.ts, state.ts, getters.ts, mutations.ts, actions.ts, types.ts). Use $typedState and $typedGetters for type-safe access from components.
WebSocket calls go through SocketActions methods. Pass a wait parameter (constants in src/globals.ts) to drive UI loading state — for example, wait: Waits.onPrintPause.
Auto-imported components. Anything under src/components/common, layout, or ui is registered automatically by unplugin-vue-components — no manual import needed. The generated components.d.ts at the repo root is regenerated on every build; do not edit it by hand.
Cross-component messaging. Use the Vuex store for shared state, or the EventBus (src/eventBus.ts) for ephemeral events such as flash messages.
Logging. Use consola, not console.log (configured in src/setupConsola.ts).
Where to add things
- A new widget → create a folder in
src/components/widgets/<name>/and import the component where it's used. - A new route → add a lazy import to
src/router/index.tsand create the page insrc/views/<Name>.vue. - New store data → add a module under
src/store/<name>/with the six standard files (including the module'sindex.ts), register it insrc/store/index.ts, and updatesrc/store/types.tssoRootModules,RootState, andRootGetterspick it up. - A new translation key → edit
src/locales/en.yaml. Weblate handles the other languages — do not edit them directly. - A new icon → add an MDI mapping to the
Iconsobject insrc/globals.ts, then use it as<v-icon>{{ $globals.Icons.myIcon }}</v-icon>.
Going deeper
The repository's CLAUDE.md file is an exhaustive reference originally written for AI coding assistants. It covers topics that are out of scope for this quick orientation — the auth state machine and token-refresh policy, the full list of build-toolchain gotchas, every Vuex module, and more. If you've outgrown this overview, that's the next stop.
Dev Container in Visual Studio Code
Fluidd includes a Dev Container configuration to easily open with Visual Studio Code (VSCode) and have every tool and dependency installed.
Install Visual Studio Code
Follow the instruction from Visual Studio Code to install.
Make sure to also install the Dev Containers extension so that VSCode knows how to use the Dev Container configuration.
Install Docker
Follow the instruction from Docker to install.
Open the Dev Container
At this point all you need to do is open Fluidd folder in VSCode and you should see a popup indicating that it found a Dev Container configuration file; click the "Reopen in Container" to have everything configured.
The configuration includes a container running docker-klipper-simulavr, a virtualized Klipper and Moonraker image that makes it easy to debug without a real printer.
Running Fluidd locally
Install Node.js
Follow the instructions from Node.js to install Node.js, v24.x.
Fluidd pins its own Node.js version in package.json via devEngines.runtime, so pnpm downloads and uses that version for the project regardless of the one you install here — this step only bootstraps the pnpm installer below.
Check that Node.js was installed properly:
Install pnpm
Fluidd uses pnpm as its package manager. Install it once with pnpm's own installer — Node.js v22.13 or newer is needed to run it, but not to run pnpm afterwards:
Run it from outside the Fluidd clone: npm refuses to run inside a project whose devEngines.packageManager names another package manager.
The required version is pinned in package.json via devEngines.packageManager, and pnpm downloads and runs that exact version whenever you work in the Fluidd repository, whichever version you installed above.
Verify that pnpm resolves correctly:
Install dependencies
This also runs the prepare script, which installs the Git hooks that validate your commit messages and lint staged files before each commit.
Run a local development server
Browse to http://localhost:8080/ and type in the URL of your Moonraker instance, e.g. http://192.168.0.101:7125.
Run unit tests
Running the documentation site locally
Install Python
Follow the instructions from Python to install Python 3.
Install Python dependencies
cd .../path/to/fluidd/docs
python3 -m venv .venv
source .venv/bin/activate
pip install -r requirements.txt
Serve locally
Browse to http://localhost:8000/.
Build static site
Localization
Fluidd uses vue-i18n for its localization.
Locales can be found in the src/locales folder and are in YAML format.
Vuetify component translations
Vuetify keeps its own string table, separate from src/locales, for strings its components render without Fluidd passing them — the v-data-table footer, pagination and sort aria-labels, and the v-file-input counter. These translations ship with Vuetify and are not managed through Weblate, so editing src/locales will not change them.
src/plugins/vuetify.ts maps each Fluidd locale code onto the matching Vuetify one and loads it when the language changes. Most codes match one-to-one; the exceptions are zh-CN, zh-HK and pt_BR, which map onto Vuetify's zh-Hans, zh-Hant and pt. A code left out of that map falls back to English, which is what happens for Tamil — Vuetify has no ta translation.
Adding a language therefore needs an entry in that map alongside the one in SupportedLocales (src/globals.ts), unless Vuetify has no translation for it.
How to contribute
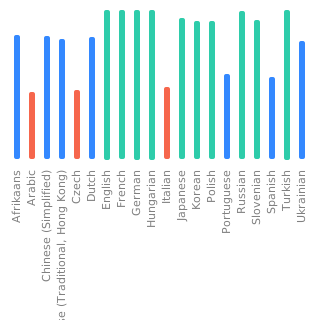
Translations are hosted on Weblate. If you want to help translating our project, please click the widget below:
Tooling
VSCode and i18n Ally
If you prefer, you can use VSCode and the i18n Ally extension to help translating offline.
If you're setup with VSCode, then this extension comes highly recommended.
Once you have a translation in hand, you can either PR the code changes directly or create an issue with the translations attached.