Printing
Fluidd provides tools to preview, monitor, and manage your prints — from G-code visualization to thumbnail previews and print history.
G-code Viewer
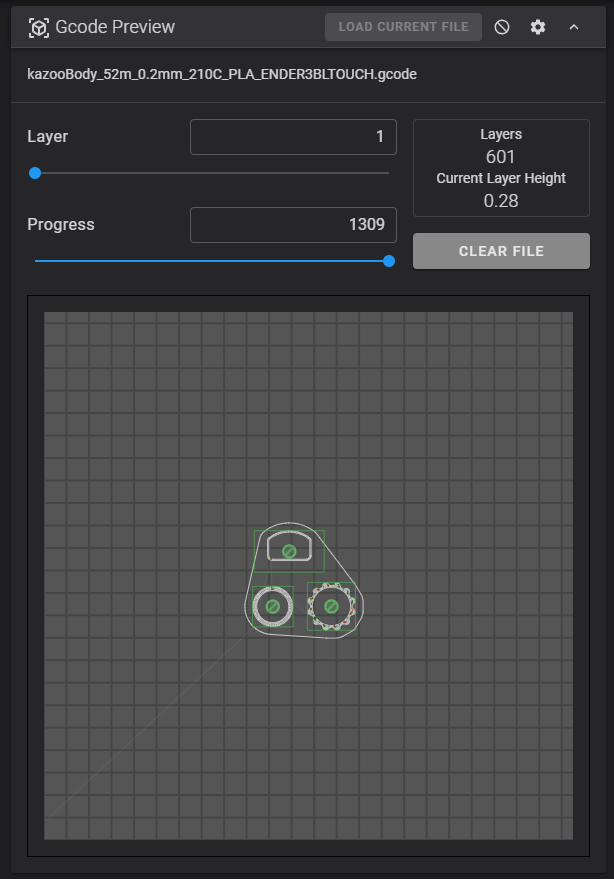
Fluidd's G-code viewer provides a 2D visualization of the currently selected layer. It can automatically follow print progress and show information about the moves being executed. Multi-tool prints are supported, with each tool shown in a distinct color.
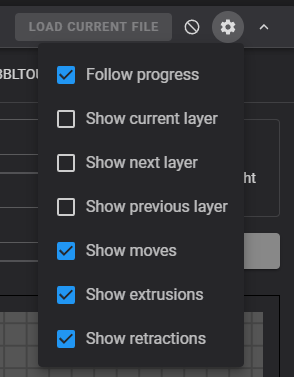
Frequently used settings are accessible via the cog icon in the card header. Less common options can be found on Fluidd's settings page.

Exclude Object
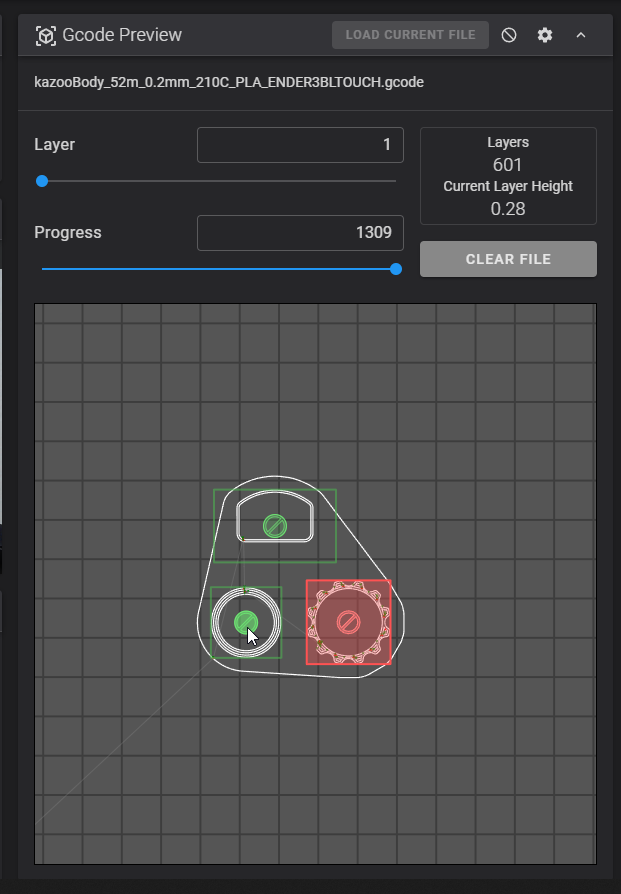
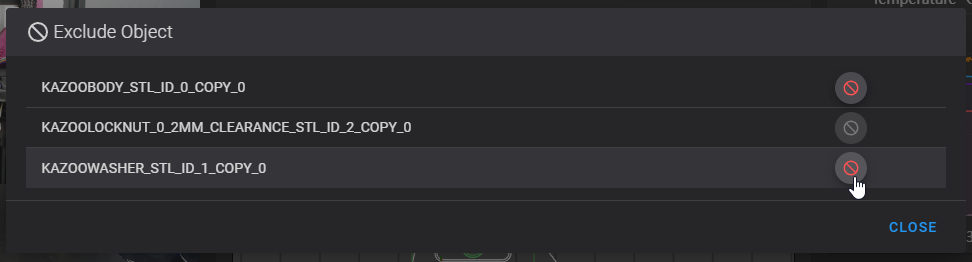
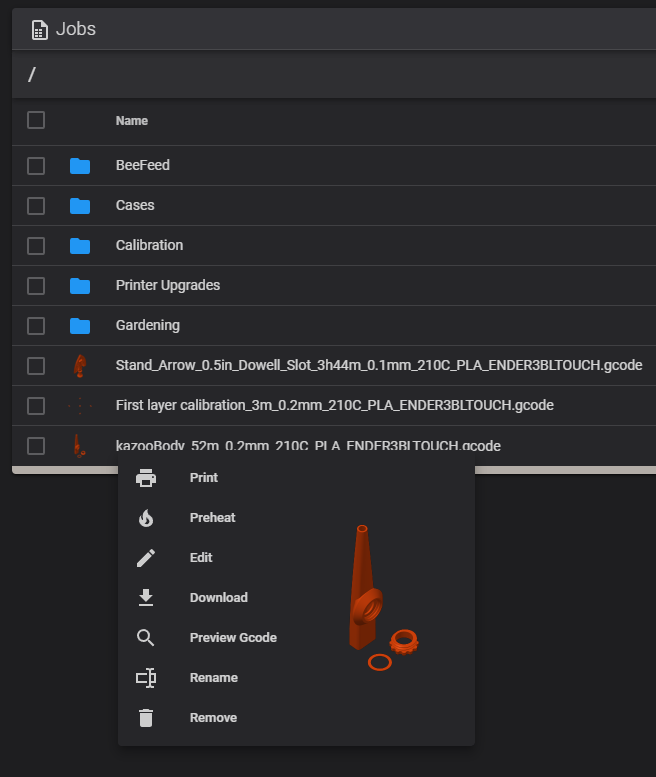
The G-code viewer has Exclude Object support built in. To exclude an object from your current print (for example after a failure), click the cancel icon in the G-code preview or bring up a list of all objects by clicking the cancel icon in the card header.
Excluded objects are marked in red, the currently printing object in blue, and all other objects in green.
For this feature to work, complete the following setup:
-
Add to
printer.cfg: -
Add to
moonraker.conf: -
Re-slice your model with object labeling enabled in your slicer:
- PrusaSlicer / OrcaSlicer: Print Settings → Output options → Label objects
- SuperSlicer: Print Settings → Output options → Label objects
- Cura: Extensions → Post Processing → Modify G-Code → Insert at layer change → add object labels
Reprocessing required
This only works on files uploaded after enabling these settings — Moonraker needs to process the file with object preprocessing turned on.
Thumbnails
Fluidd can display thumbnail previews of your print files. The recommended sizes are:
300x300— for large previews48x48— for file browser thumbnails
PrusaSlicer (2.3.0+)
- Open
Printer Settings→Generaltab →Firmwaresection. - Set
G-code thumbnailsto48x48/PNG, 300x300/PNG.
PrusaSlicer (2.2.0 and below)
- Click
Help→Show Configuration Folder, then close PrusaSlicer. - Open the
printerfolder and edit your printer profile. - Set
thumbnails = 48x48, 300x300. - Restart PrusaSlicer.
SuperSlicer
- Open
Printer Settings→Generaltab →Thumbnailssection. - Set
Smallto48x48andLargeto300x300.
OrcaSlicer
- Open
Printer Settings→Basic informationtab. - In the
Thumbnailssection, ensure48x48/PNGand300x300/PNGare listed. OrcaSlicer includes these by default for most printer profiles.
Cura
OctoPrint plugin (recommended): Enable
slicer uploads, then install the
OctoPrint Connection plugin.
Use the Print with OctoPrint button after slicing.
Post-processing script: Go to Extensions → Post Processing →
Modify G-Code. Add two Create Thumbnail scripts — one at 300x300 and
one at 48x48.
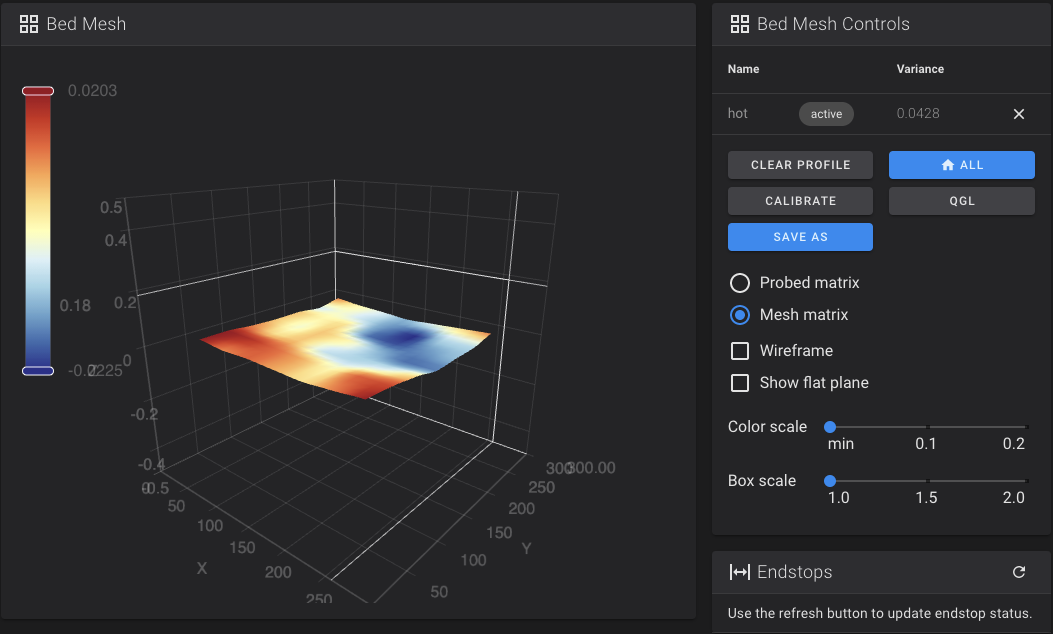
Bed Mesh
Fluidd has a built-in bed mesh viewer. Navigate to the printer page and calibrate a mesh to view it.
You need [bed_mesh] configured in Klipper for this option to appear.
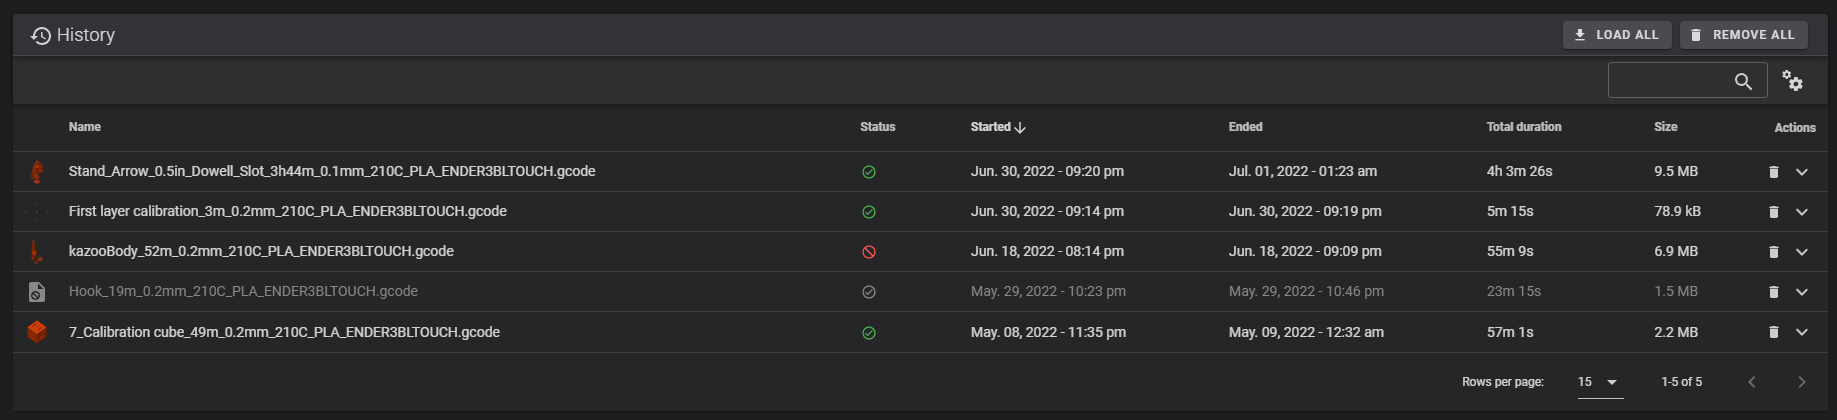
Print History
Fluidd integrates with Moonraker's print history component to give you insights into past prints.
| Action | Description |
|---|---|
| View and sort | Browse your print history chronologically, sorted by last print date. |
| Filter | Narrow the list to specific jobs or statuses. |
| Statistics | Track total print time and filament usage over time. |
| Re-print | Re-start failed or cancelled jobs directly from the history. |
Fluidd loads the last 50 prints by default. The full history can hold up to 10,000 entries — a dedicated History page is available from the main navigation for a full-screen view.


Firmware Retraction
Fluidd shows a Retraction card on the dashboard when firmware retraction is configured in Klipper. This lets you adjust retraction settings live during a print without re-slicing.
To enable firmware retraction, add to printer.cfg. See the
Klipper [firmware_retraction] reference
for all available options.
[firmware_retraction]
retract_length: 1.0
retract_speed: 45
unretract_extra_length: 0
unretract_speed: 45
Also enable firmware retraction in your slicer (usually under Extruder or
Printer settings) so it emits G10/G11 commands instead of explicit
E moves.